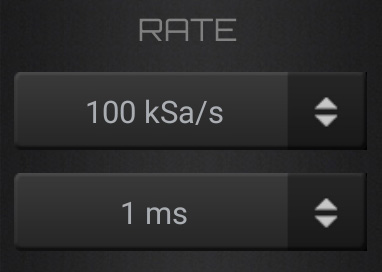
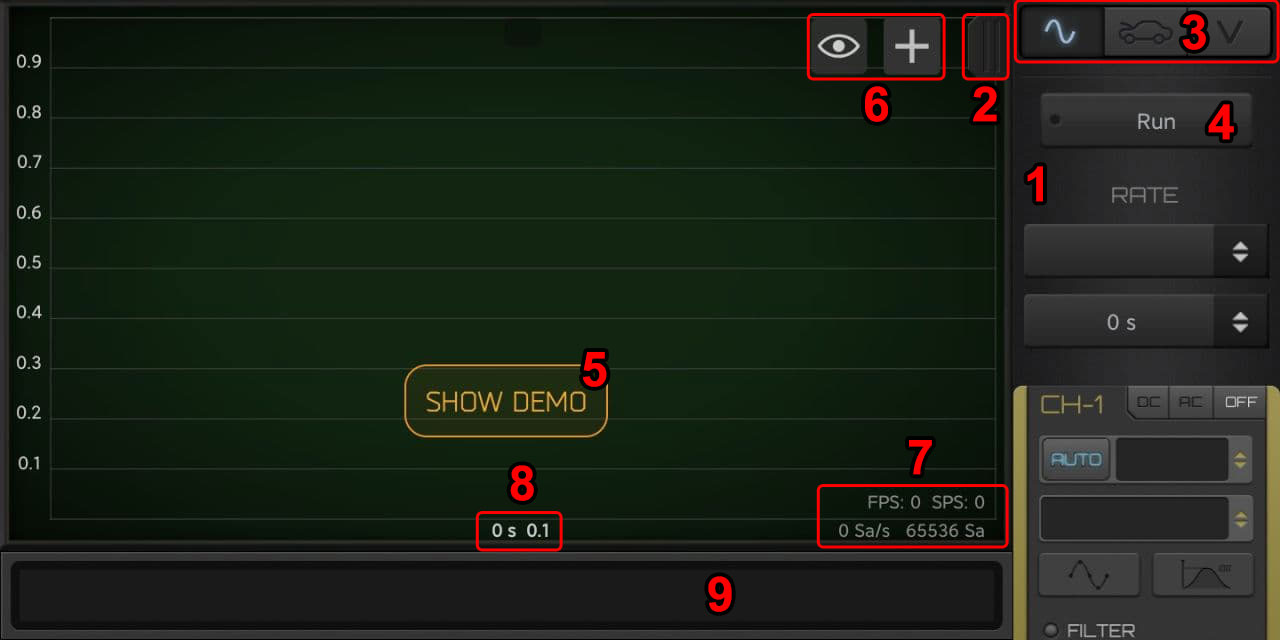
Differently for standard oscilloscopes, in HScope you can select the acquisition rate of the oscilloscope. Selecting the rate means to set how many points/second (or Samples/s) you want to use to scan the input signal. After selecting the rate you can choose the time/division.
Rate Panel
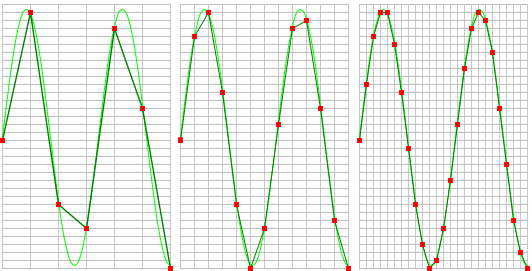
This value is also related to the maximum frequency you suppose to find for your signal. Assuming your signal is a Sine like shape you may practically need at least 10 points inside one period.
Visualization of Waveform with different Sampling Rate
So with a rate of 100 KS/s (Kilo Samples / second) you can see well waves till 10KHz. If these waves have faster variations then you need to increase the rate level.
Square signals has infinite bandwidth, so they may requires high sampling rates to see well the edges.
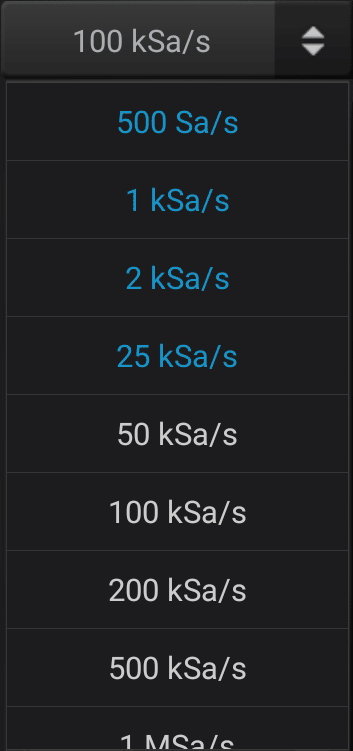
ROLL MODE RATES
Roll mode rates are slow rates indicated in blue color in the rate list selector. At these rates the signal update in real time on the main screen going from left to right.
Currently is is not possible to use Trigger functions with a Roll Mode rate.
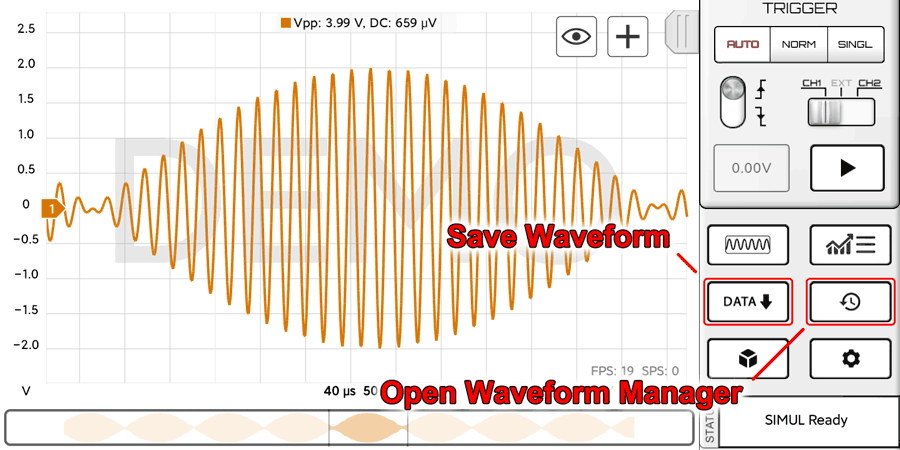
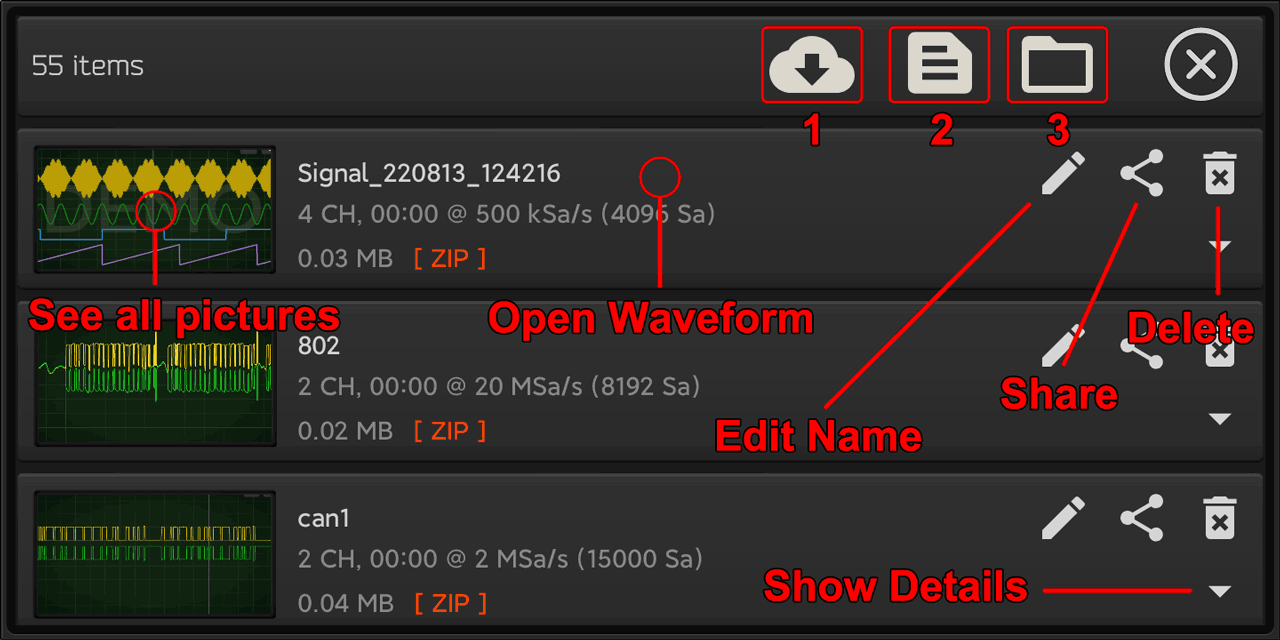
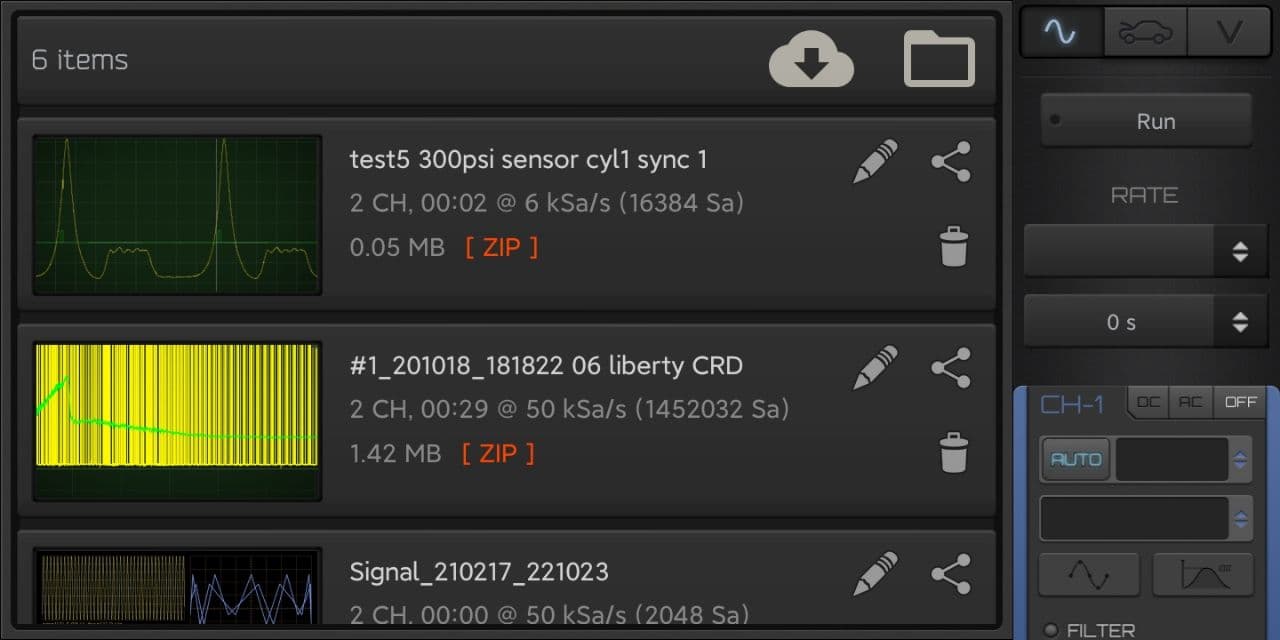
With HScope you can import/export and share waveforms.
Most of the operations are done in the Waveform Manager:
Import from Cloud button: import a Waveform from the Cloud (it requires to know the Waveform ID, see under)
Import Waveform file from Phone (HScope .zip file format)
Import all Waveforms from a folder in the Phone (HScope .zip file format)
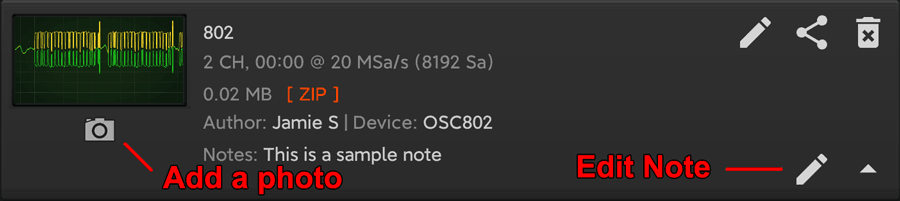
You can see additional information about the waveform by pressing the Show Details button:
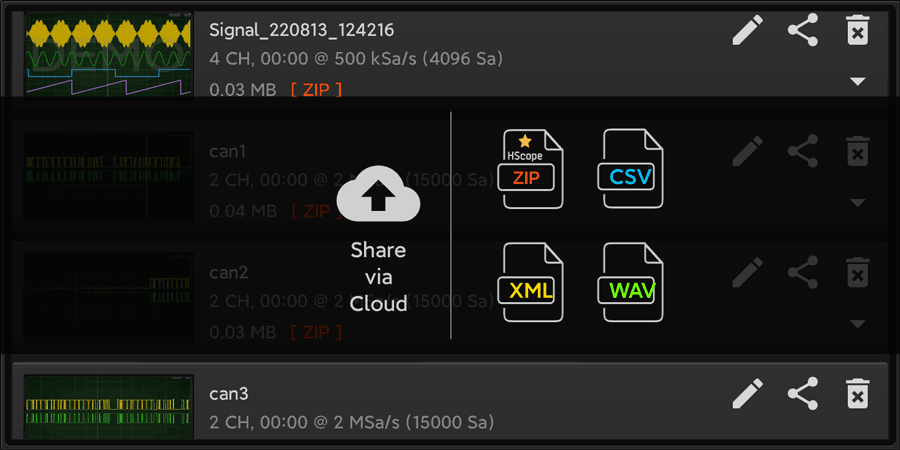
Waveform File Format
The Waveforms are saved inside .zip files. The package contain waveform information and data in an open XML format, and the pictures/photos related to the waveform.
You can also export the waveform in another format by using the Share Button.
Cloud Sharing
You can send waveforms to colleagues or friends by using the Cloud Sharing, a free feature in HScope.
Click on the Share Button, then you select the Share via Cloud button:
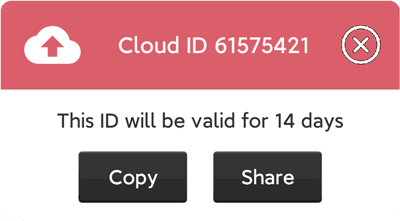
After pressing the button the Waveform will be loaded and HScope will show you the Waveform ID that you can copy to the Clipboard or directly share to a friend.
On the other side, use the Import from Cloud button to input the number of the Waveform you want to import.
Note: If you copy to the Clipboard the Waveform ID from a chat, or a sentence containing it, when you press Import from Cloud button it will recognize automatically the number from the Clipboard.
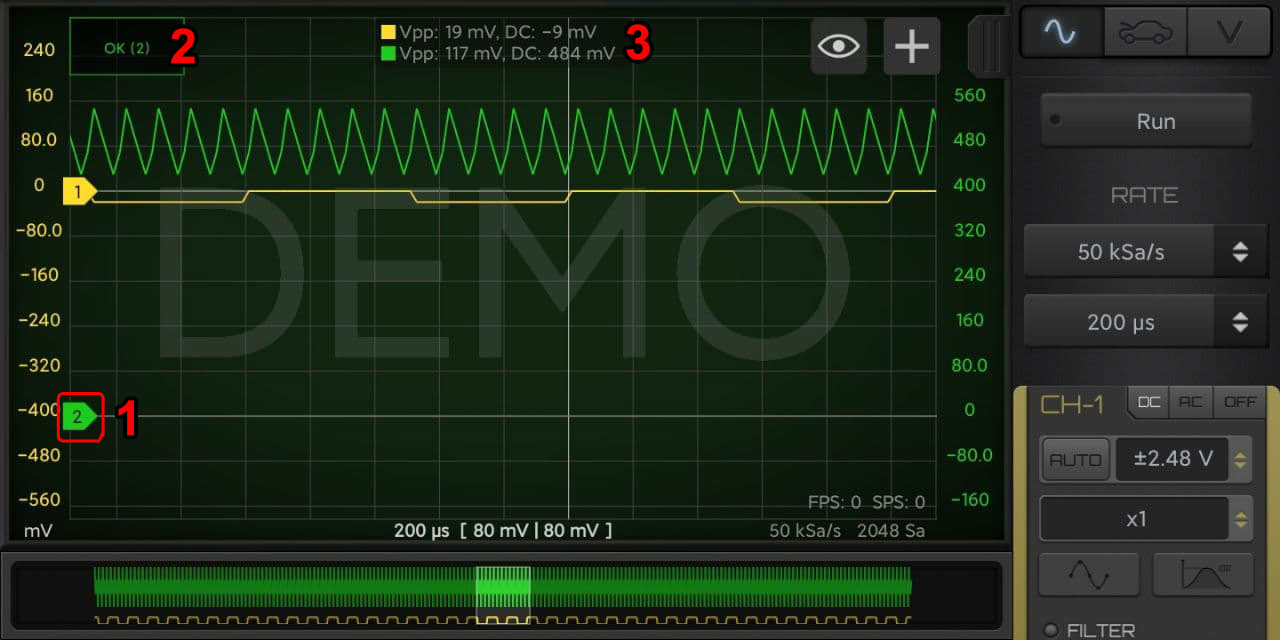
Statistics: show the current sampling rate and the number of samples acquired in each scan. When enabled in the settings you can see the FPS/SPS value. SPS: Scan Per Second: the number of data buffers acquired from the oscilloscope each second. FPS: Frame Per Second: the number of graphic frames showed on screen each second.
Time/div, Volt/div: it show the X and Y quantity for each division.
Data Scroller: show the whole data buffer and allow you to fast scroll the data.
Finger operations
Scroll
Use one finger on the screen to scroll the signal in all directions.
Zoom
Use 2 fingers to zoom the signal in or out. The is no limit for zoom in. Zoom out is limited to the max area used by the signal.
Auto Zoom
Tap 2 times on the screen to get the signal zoom to fit the screen.
Adjust Signals Position / Scale
When running you can see the channel signals in different colors.
Each channel position can be moved by clicking on the handler on the left. While moving a channel you can also zoom it, changing its scale respect the other channels.
Confirm the channel position and scale by clicking on this button or wait 3 seconds for auto-confirm.
Channels basic stats: amplitude peak-to-peak and DC value (when the channel input is set on DC coupling mode).
Read this part if you want to migrate your old HScope data on a new Android 10+ device.
Introduction
In Android 10+ if you want HScope to save and open waveforms, you should authorize the app to access a specific user folder. For performances reasons HScope will keep all data in its private folder and synchronize this data with the public user folder in order to avoid data loss and to allow the user to save or share this data.
The data in the public user folder (ie. /Documents/HScope) should not be modified manually otherwise you need to delete the app data (in the Android settings) and do this procedure again to keep the data syncronized.
1. Copy the data
Copy all HScope data on the new Android device. Source is /Downloads/HScope, destination can be under the Documents or Downloads folder (ie. /Documents/HScope).
2. Configure the Documents Folder in HScope
In Settings → System select the folder where you copied the HScope data (public Documents Folder).
After you select the HScope folder the app will import all the waveforms.
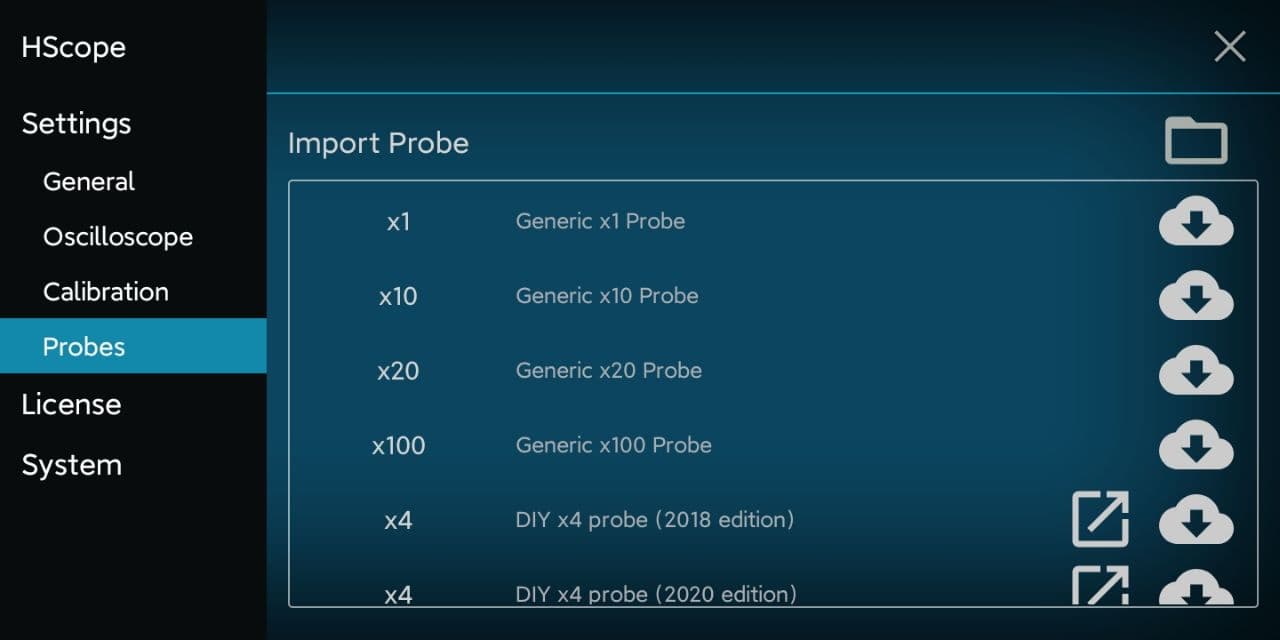
3. Import the Probe Settings
In Settings → Probes go in the download panel, then click on the folder icon (on top-right).
Select the file Probes.cfg in HScope documents folder. This operation will import all the previous probes settings.
4. Import other Waveforms (optional)
In the Waveforms screen (both Oscilloscope and Automotive mode) click on the folder icon (on top-right).
Select the folder of the Waveforms that you want to import (ie. /Scope or /Automotive under /Documents/HScope/). All the waveforms in the selected folder will be imported inside the Oscilloscope or Automotive list.
In case you import the wrong folder in the wrong HScope section (for example Automotive files inside the Oscilloscope list), you can delete all the app data in the Android Application Settings and do the importing again.
Warning: after you import the waveforms data, the data will the linked so if you delete a waveform in HScope, the waveform will be deleted also in the public Documents Folder. Also for the probes, any change to the list will overwrite the Probes.cfg file in the public Documents Folder.
After installing the App, connect the USB Oscilloscope with an OTG cable. The App should detect automatically the Oscilloscope and ask the Authorization to use the USB Port. This Authorization may be asked twice and you can select the box “remember the choice” if you don’t want this window show again at the next connection.
If the everything works correctly you should see the signal on the App screen.
Typical setup with micro-USB to Type-B OTG short cable
WiFi Devices
For WiFi devices (like Hantek iDSO1070 and the DIY HS402 WiFi) first connect the phone to the oscilloscope WiFi network, then open the App. The App should connect to the Wifi oscilloscope automatically (pay attention to enable the WiFi connection in the Settings).
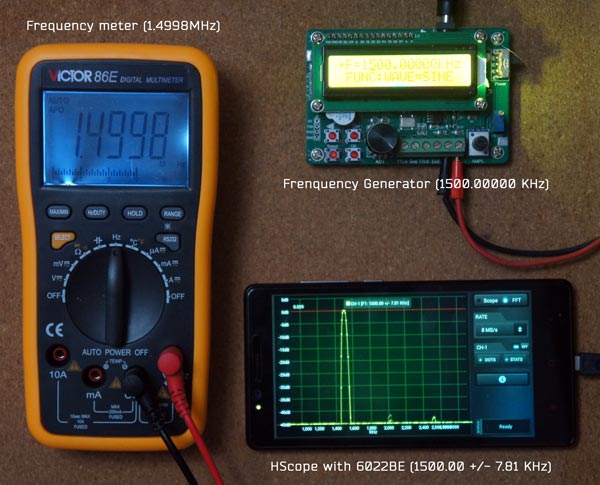
Sample System
Setup used for the System testing (Oscilloscope not in the photo):
We use technologies like cookies to store and/or access device information. We do this to improve browsing experience and to show personalized ads. Consenting to these technologies will allow us to process data such as browsing behavior or unique IDs on this site. Not consenting or withdrawing consent, may adversely affect certain features and functions.
Functional
Always active
The technical storage or access is strictly necessary for the legitimate purpose of enabling the use of a specific service explicitly requested by the subscriber or user, or for the sole purpose of carrying out the transmission of a communication over an electronic communications network.
Preferences
The technical storage or access is necessary for the legitimate purpose of storing preferences that are not requested by the subscriber or user.
Statistics
The technical storage or access that is used exclusively for statistical purposes.The technical storage or access that is used exclusively for anonymous statistical purposes. Without a subpoena, voluntary compliance on the part of your Internet Service Provider, or additional records from a third party, information stored or retrieved for this purpose alone cannot usually be used to identify you.
Marketing
The technical storage or access is required to create user profiles to send advertising, or to track the user on a website or across several websites for similar marketing purposes.
 Guide
Guide