Setting the Trigger
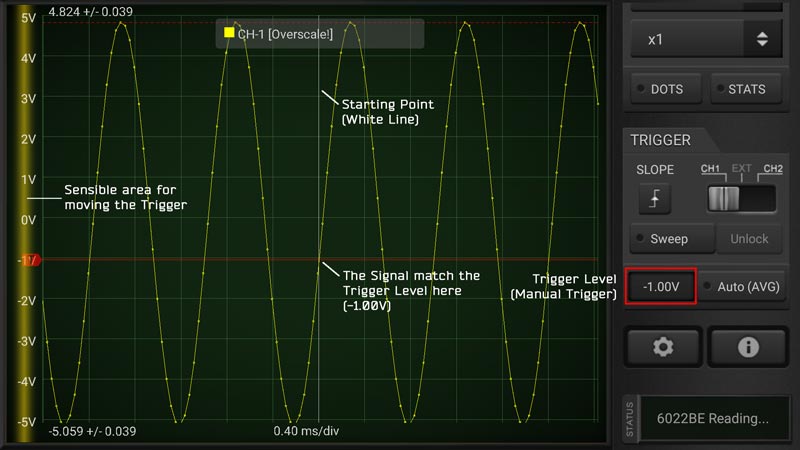
The Trigger allow you to see the signal stable on the screen since the Trigger set what is the starting point for drawing the signal. Even if the input signal can be periodic in some way, on each scan its position can be found translated since the acquisition time is random and it cannot be synchronous with the period of the input signal.
The starting point for a signal can be identified with:
- a Voltage Level (Trigger Level);
- a tendency (or Slope) which means if the signal is passing the Voltage Level going up or down.
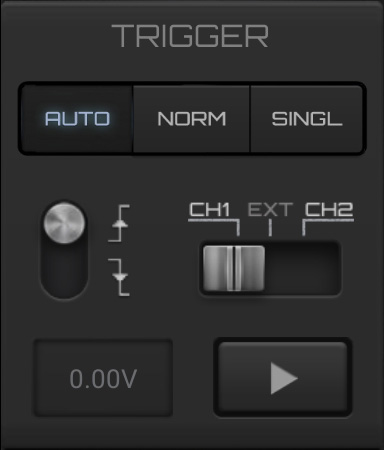
Once decided the kind of trigger (AUTO, NORMAL, SINGLE), you can set the SLOPE (arrow up or down) and the input Channel (only CH1 and CH2 are working and they are oscilloscope depending).
- AUTO Trigger: set the Trigger Level as the middle level of the input voltage.
- NORMAL Trigger: allow you to set the Voltage Level for the trigger. Every time the condition is met the signal is visualized on the screen.
- SINGLE Trigger: as Normal Trigger but will show the signal just at the first occurrence of the condition, then it stops the acquisition. You can resume the acquisition by pressing the
playbutton.