The Main Interface
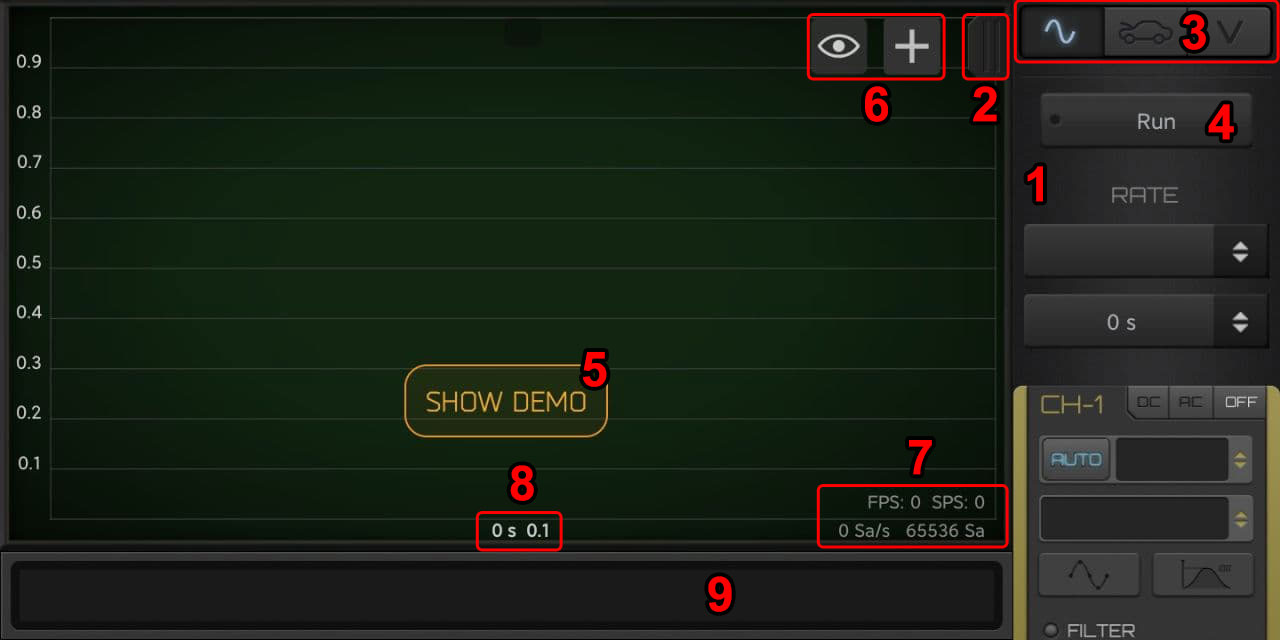
- Main menu: you can scroll to access all controls.
- Hide/Show menu button.
- Mode Switch button: it switch among the main interfaces - Oscilloscope, Automotive (it requires the specific module) and Data Logger.
- Run/Stop button: start and stop the acquisition (when the oscilloscope is connected).
- DEMO button: start the Demo mode with a sample signal so to try the app and the functions.
- Tools buttons (see the specific guide)
- Statistics: show the current sampling rate and the number of samples acquired in each scan. When enabled in the settings you can see the FPS/SPS value. SPS: Scan Per Second: the number of data buffers acquired from the oscilloscope each second. FPS: Frame Per Second: the number of graphic frames showed on screen each second.
- Time/div, Volt/div: it show the X and Y quantity for each division.
- Data Scroller: show the whole data buffer and allow you to fast scroll the data.
Finger operations
Scroll
Use one finger on the screen to scroll the signal in all directions.
Zoom
Use 2 fingers to zoom the signal in or out. The is no limit for zoom in. Zoom out is limited to the max area used by the signal.
Auto Zoom
Tap 2 times on the screen to get the signal zoom to fit the screen.
Adjust Signals Position / Scale
When running you can see the channel signals in different colors.
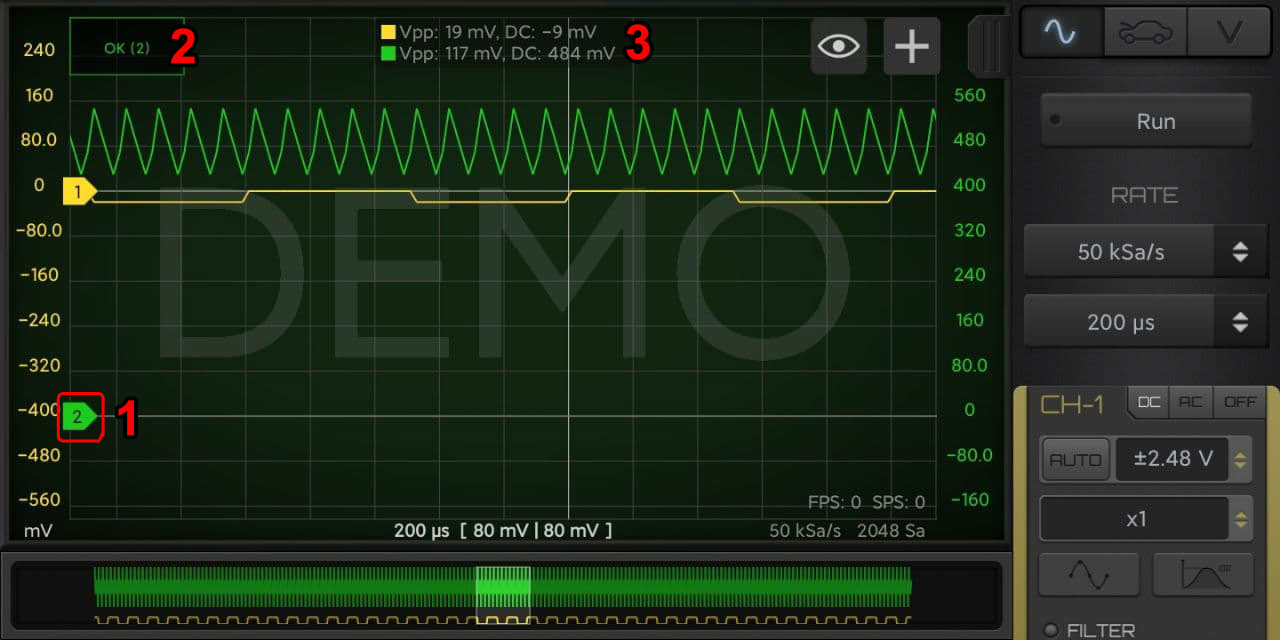
- Each channel position can be moved by clicking on the handler on the left. While moving a channel you can also zoom it, changing its scale respect the other channels.
- Confirm the channel position and scale by clicking on this button or wait 3 seconds for auto-confirm.
- Channels basic stats: amplitude peak-to-peak and DC value (when the channel input is set on DC coupling mode).