ECG with STM32 and AD8232
In this project, we will interface AD8232 ECG Sensor with HS101 Oscilloscope (based on STM32 bluepill board) and observe the ECG signal on HScope.
The AD8232 is an integrated signal conditioning block for ECG and other biopotential measurement applications. It is designed to extract, amplify, and filter small biopotential signals in the presence of noisy conditions, such as those created by motion or remote electrode placement. This design allows for an ultralow-power analog-to-digital converter (ADC) or an embedded microcontroller to acquire the output signal easily.
Medical uses of ECG
An electrocardiogram can be a useful way to find out whether your high blood pressure has caused any damage to your heart or blood vessels. Because of this, you may be asked to have an ECG when you are first diagnosed with high blood pressure.
Some of the things an ECG reading can detect are:
- cholesterol clogging up your heart’s blood supply
- a heart attack in the past
- enlargement of one side of the heart
- abnormal heart rhythms
Electrocardiogram(ECG)
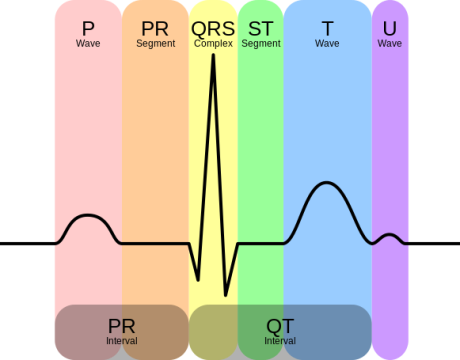
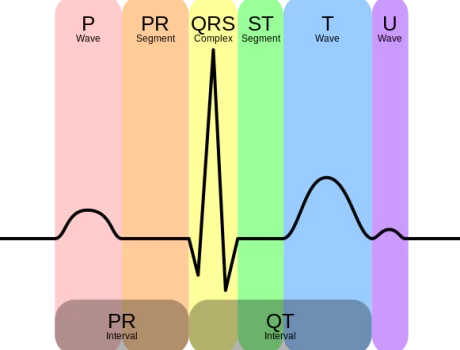
The P wave of electrocardiogram represents atrial contraction. The PR interval is a measure of time from the onset of atrial contraction to the onset of ventricular contraction. The QRS complex represents the complete depolarization of the ventricles.


The ST segment represents the complete depolarization of the ventricles. elevation or depression of this segment may indicate heart muscle ischemia.


The Q T interval represents the complete depolarization and repolarization of the ventricles.
A prolonged Kutty interval is a risk factor for ventricular arrhythmias and sudden death.


Required Components
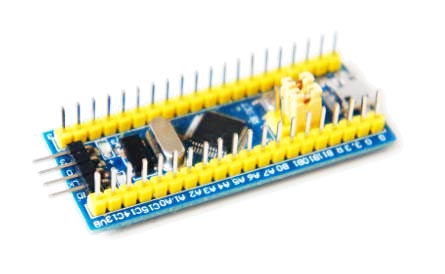
- STM32 Bluepill board
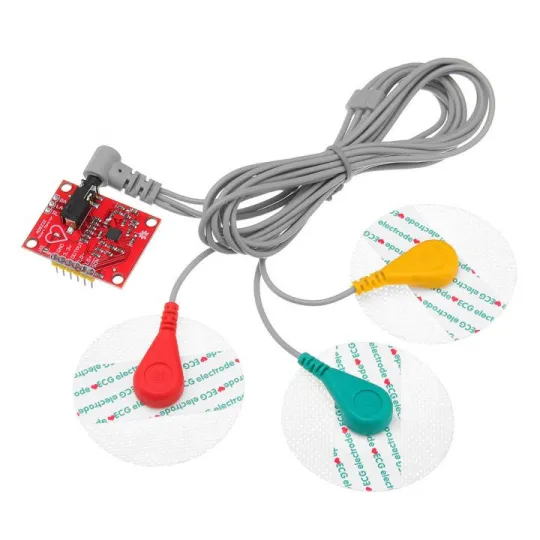
- AECG Module AD8232 with electrodes and connectors
- Connecting Wires
Built
Circuit Diagram
The AD8232 Heart Rate Monitor breaks out nine connections from the IC. We’ll connect 3 of the nine pins on the board to the STM32.
(diagram)
Flashing the STM32
The firmware flashing is made with the app STM32 Utils which allow the direct flashing of the HS101 firwmare. In this app there are the instructions on how to connect the USB-TTL Cable to the STM32 Blue Pill board.
After the connecting, and pressing Init Chipset:
1) Go to Init Chipset and check that the app read the chipset
2) Go to the Blue Box icon and in the list select HS10X Oscilloscope, then FLASH FW
After flashing disconnect the USB-TTL cable from the STM32 board and reset the jumpers to the original position.
In case you have your own programmer then you can get the firmware from GitHub
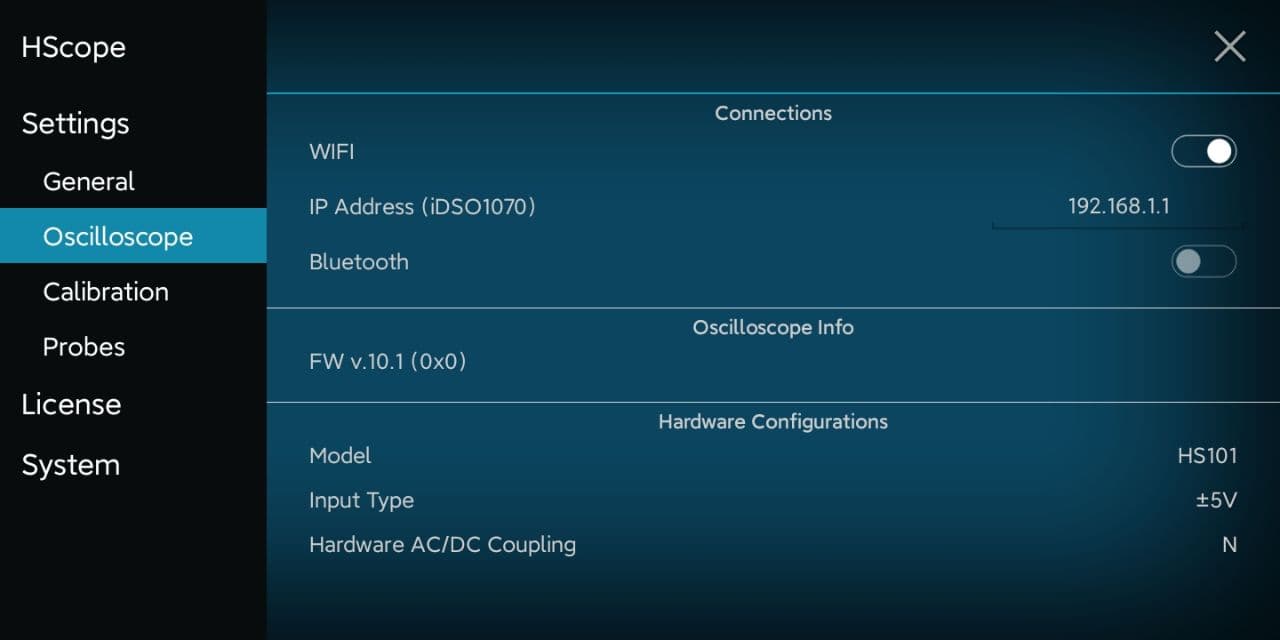
Configurations in HScope
Once connected the HS101 to your Android device you can see it in HScope Settings → Oscilloscope. Select:
- Model: HS101
- Input Type: ±5V
- Hardware AC/DC Coupling: N
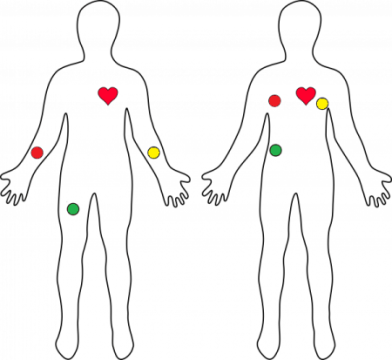
ECG Sensor Placement on Body
It is recommended to snap the sensor pads on the leads before sticking to the body, the closer to the heart, the better the measurement would be. The cables are color-coded to help you identify a proper placement.